Hong Shao Rou - Sticky Red Braised Pork Belly

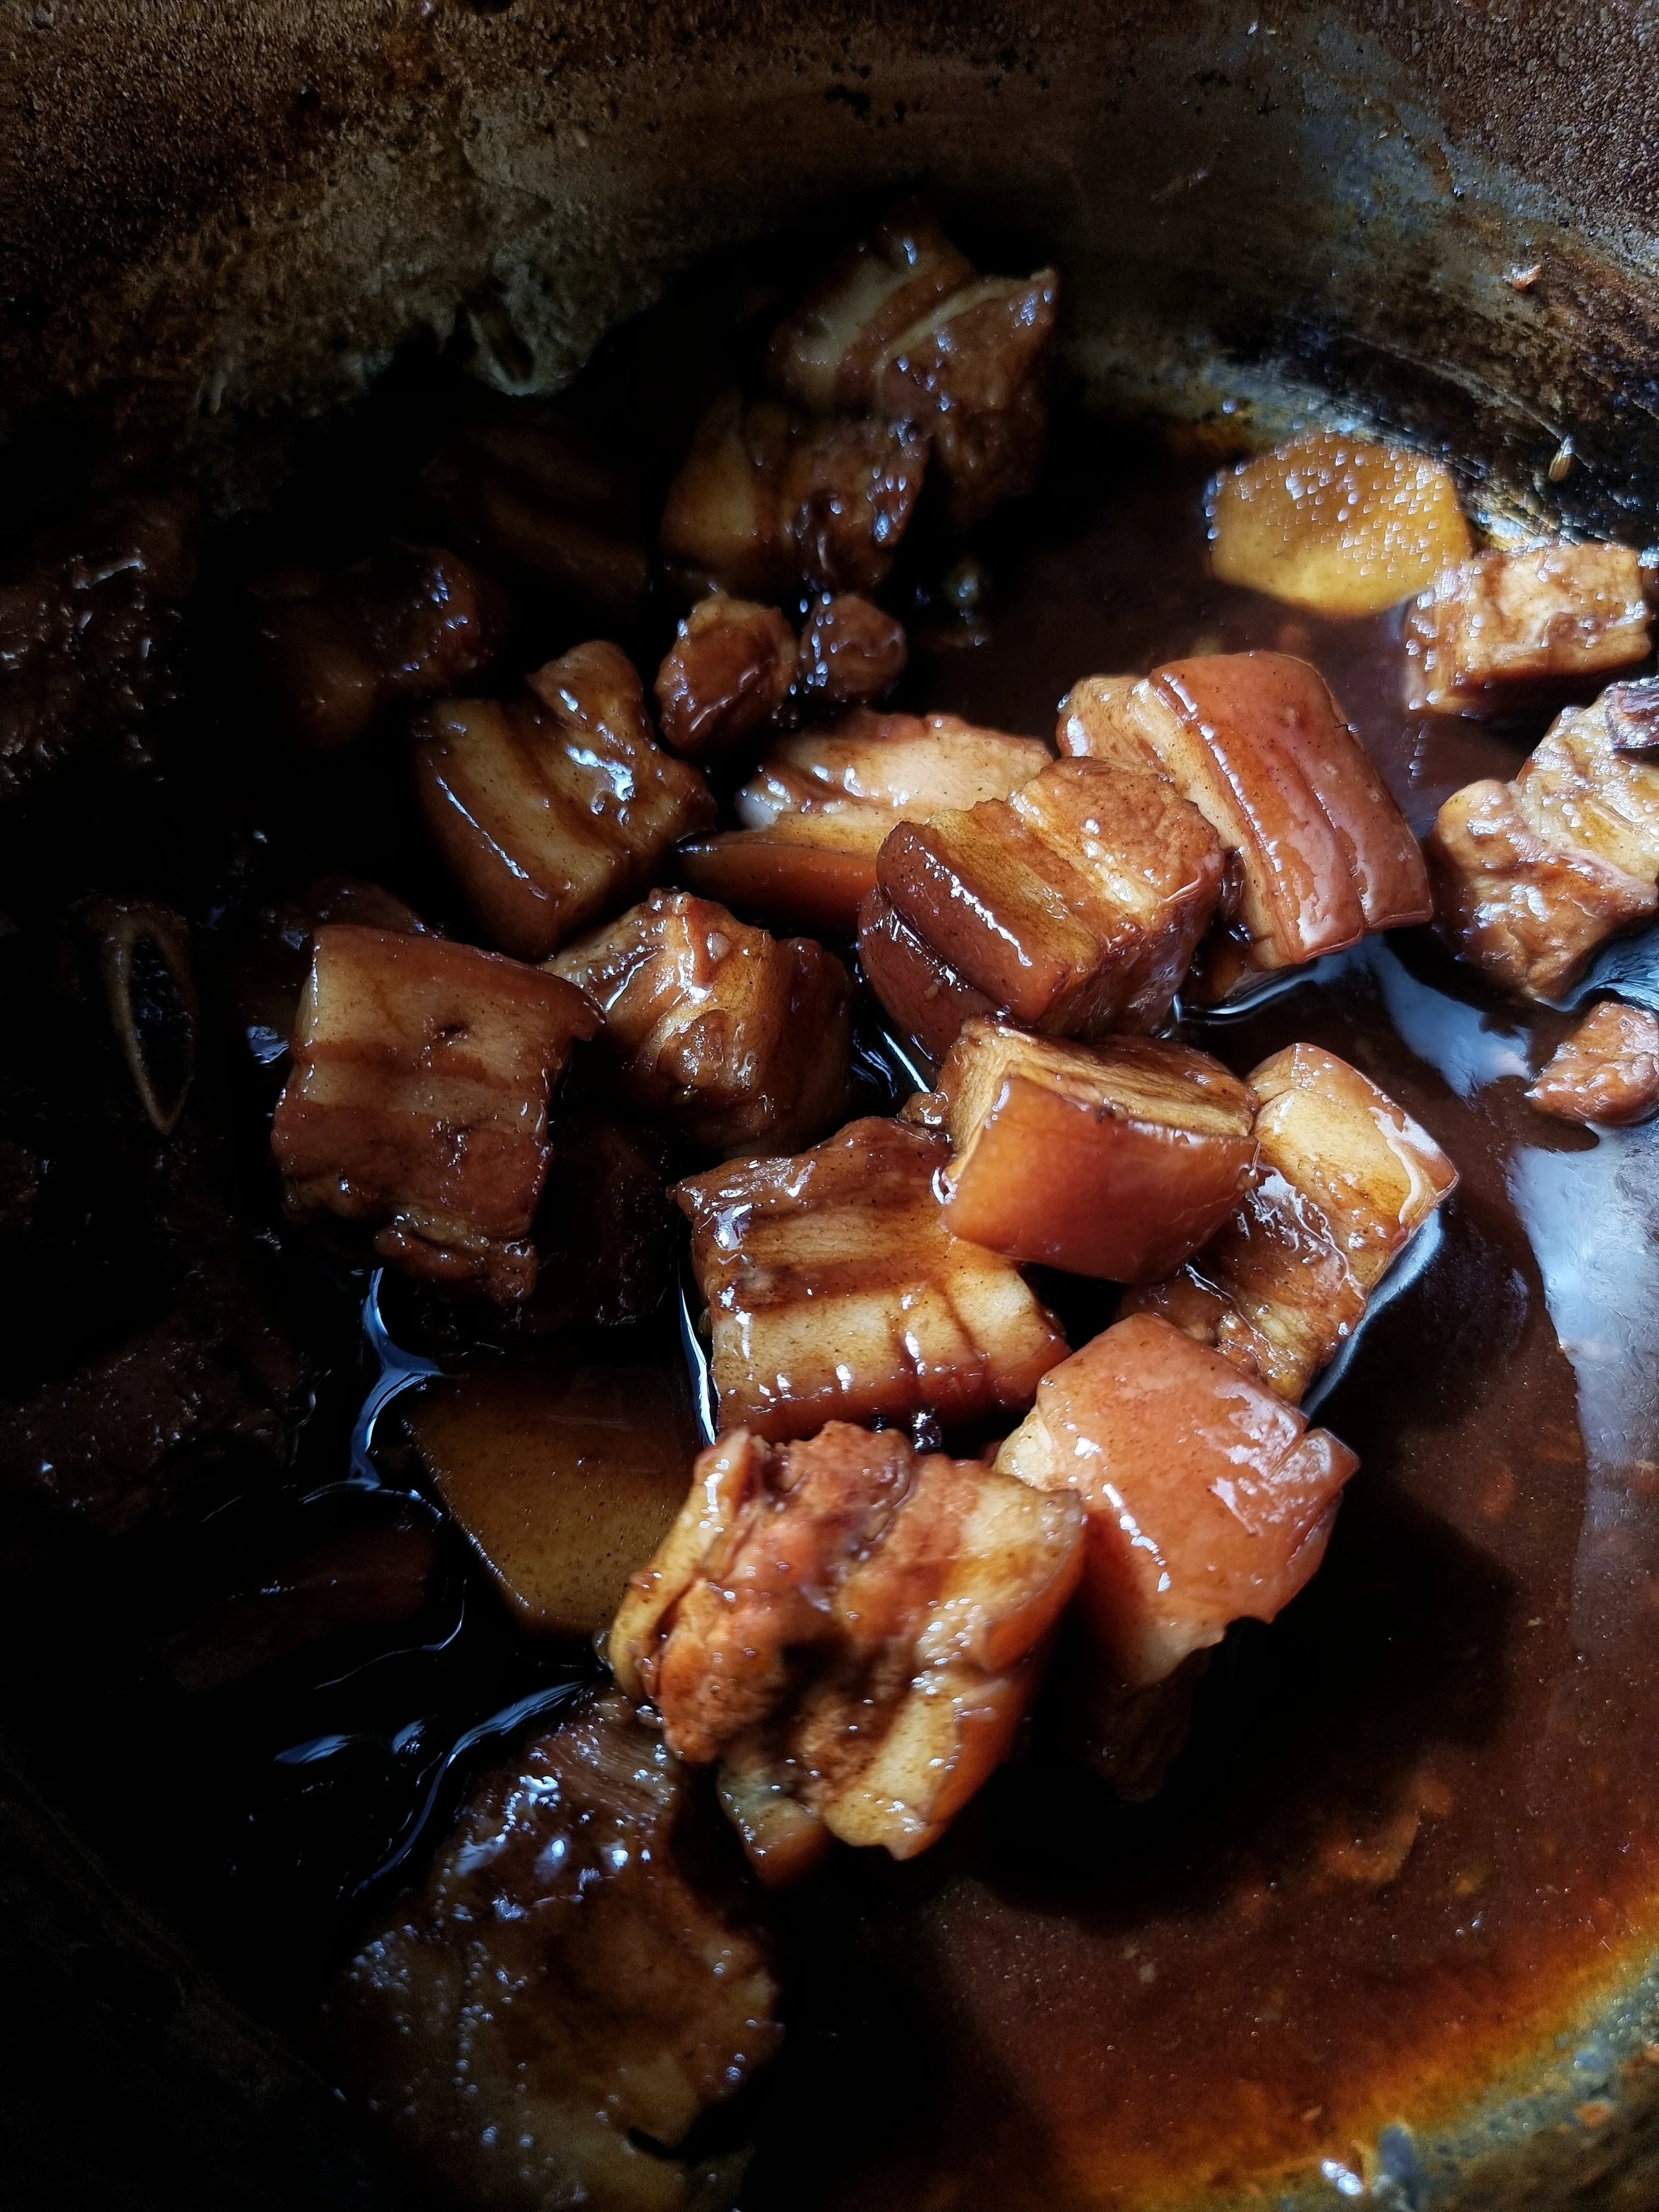
Hong shao rou, or red braised pork belly, is a lip-stickingly rich, salty-sweet good time and is a classic Hunanese dish. 

hong shao rou red braised pork belly recipe

The pork is blanched, then braised in Chinese cooking wine, a combo of soys and aromats (I used ginger, star anise, fennel seed, cinnamon, nutmeg, white pepper and cardamom)...until you don't think you're ready for this jelly (bootylicious).

The braising liquor is then reduced to a glossy, coating sauce with rock sugar, resulting in shiny, fatty nuggs of happiness, best served with steamed rice and pickled mustard greens. 

Ingredients

700g pork belly, chopped into 3cm chunks, skin on

300ml shaoxing cooking wine

3 star anise

White pepper

1 tsp fennel seeds

3-4 green cardamom pods, lightly bashed

1 cinnamon quill

1 thumb sized piece of ginger, roughly sliced

1/4 cup light soy

1/4 cup dark soy

60g rock sugar

Method

Place the diced pork belly into a pot and cover with cold water. Bring the pork up to a boil and once the scum starts to rise to the surface, immediately drain the pork and rinse well. Scrub the pot to remove any traces of scum, also. 

Place the pork back in the pot, with enough water to cover the bottom of the pot, the add in the shaoxing, aromats and soy (basically, everything but the sugar). 

Bring the liquid to the boil and then turn down to the heat and place a lid on the pot, a little ajar, so that the liquor can evaporate slightly. Simmer for 1.5 hours, or until the fat hat become gelatinous and the flesh is soft. 

Remove the lid, add the rock sugar and bring the contents up to a high boil. Stir thoroughly several times to ensure the sugar is dissolved. Reduce until the liquid is thickened and coats the pork and the bottom of the pot. Everything should be glossy and coated. 

Serve with steamed jasmine rice, Chinese pickled mustard greens, or slices of fresh tomato. 

Pork and Prawn Wontons with Black Vinegar and Chilli Oil

I’ve been making this recipe since I was probably about 3. Like many kids who grow up in families who love to cook, you start with the most basic of cooking skills and build from there. From mixing the filling to forming the dumplings and cooking them, it’s the first recipe I remember my mother teaching me… and probably the last one I will forget . Over time, this recipe has evolved and that’s the beauty of it; once you understand the base recipe, you can customise it to your taste. Add chilli, XO, Chinese five spice, add mushrooms to the mix, like most great Chinese recipes, they’re open to a little free will and imagination.

Boil them, steam them or fry them, they’re a sure fire crowd pleaser. Click here to watch me make them while guest playing guest host on Studio 10, Australia’s favourite breakfast television show!

Ingredients

3 stalks shallots (scallions), green part finely chopped

1/2 bunch coriander, very thoroughly washed, stalks and roots very finely chopped, reserve leaves for garnish

1 thumb sized piece ginger, finely grated

1/2 small tin water chestnuts, coarsely chopped

150g green prawn meat, coarsely chopped

500g pork mince (nothing too lean as you need the fat content to make these babies succulent)

2 tbsp Kecap Manis

1 tbsp light soy sauce

1 tsp ground white pepper

Salt to taste

1 packet wonton wrappers

Dressing

1 tbsp Kecap Manis

2 tbsp Chinkiang Chinese black vinegar

1 tsp Lau Gan Ma chilli flakes in oil (from any Asian grocer)

Method

In a clean mixing bowl, combine the chopped shallots, coriander, grated ginger, chopped chestnuts, prawns and pork mince. Add the seasoning ingredients and mix well to combine.

Heat a small frypan with some vegetable oil to a medium high heat and fry off a teaspoon of mixture to check the seasoning. Once you have adjusted the dumpling mixture to your liking, you’re ready to make a batch!

Assemble the wontons by filling each wonton with about one teaspoon of mixture and sealing two adjacent sides with water to form a triangle. Make sure the edges are completely sealed to avoid unfortunate explosions if you fry, and to keep all the flavour and juiciness where it should be. If you want to get fancy, wet the two longest corners of the triangle and squeeze them together to make a tortellini shape (as pictured). Continue until all the mixture has been used up (though I love using this dumpling filling recipe as meatballs, or in a stir fry, too).

Heat a pan of water and place an oiled bamboo steamer on top. Steam the dumplings for 10 minutes or until the mixture is cooked through and the pastry is tender). While the dumplings are steaming, mix the dressing ingredients to taste. Dress the wontons in a bowl and then transfer to a serving bowl. Garnish with more sauce and the reserved coriander leaves. 


Chinese-style Egg White Omelette with Prawns, Chilli and Mushroom Floss

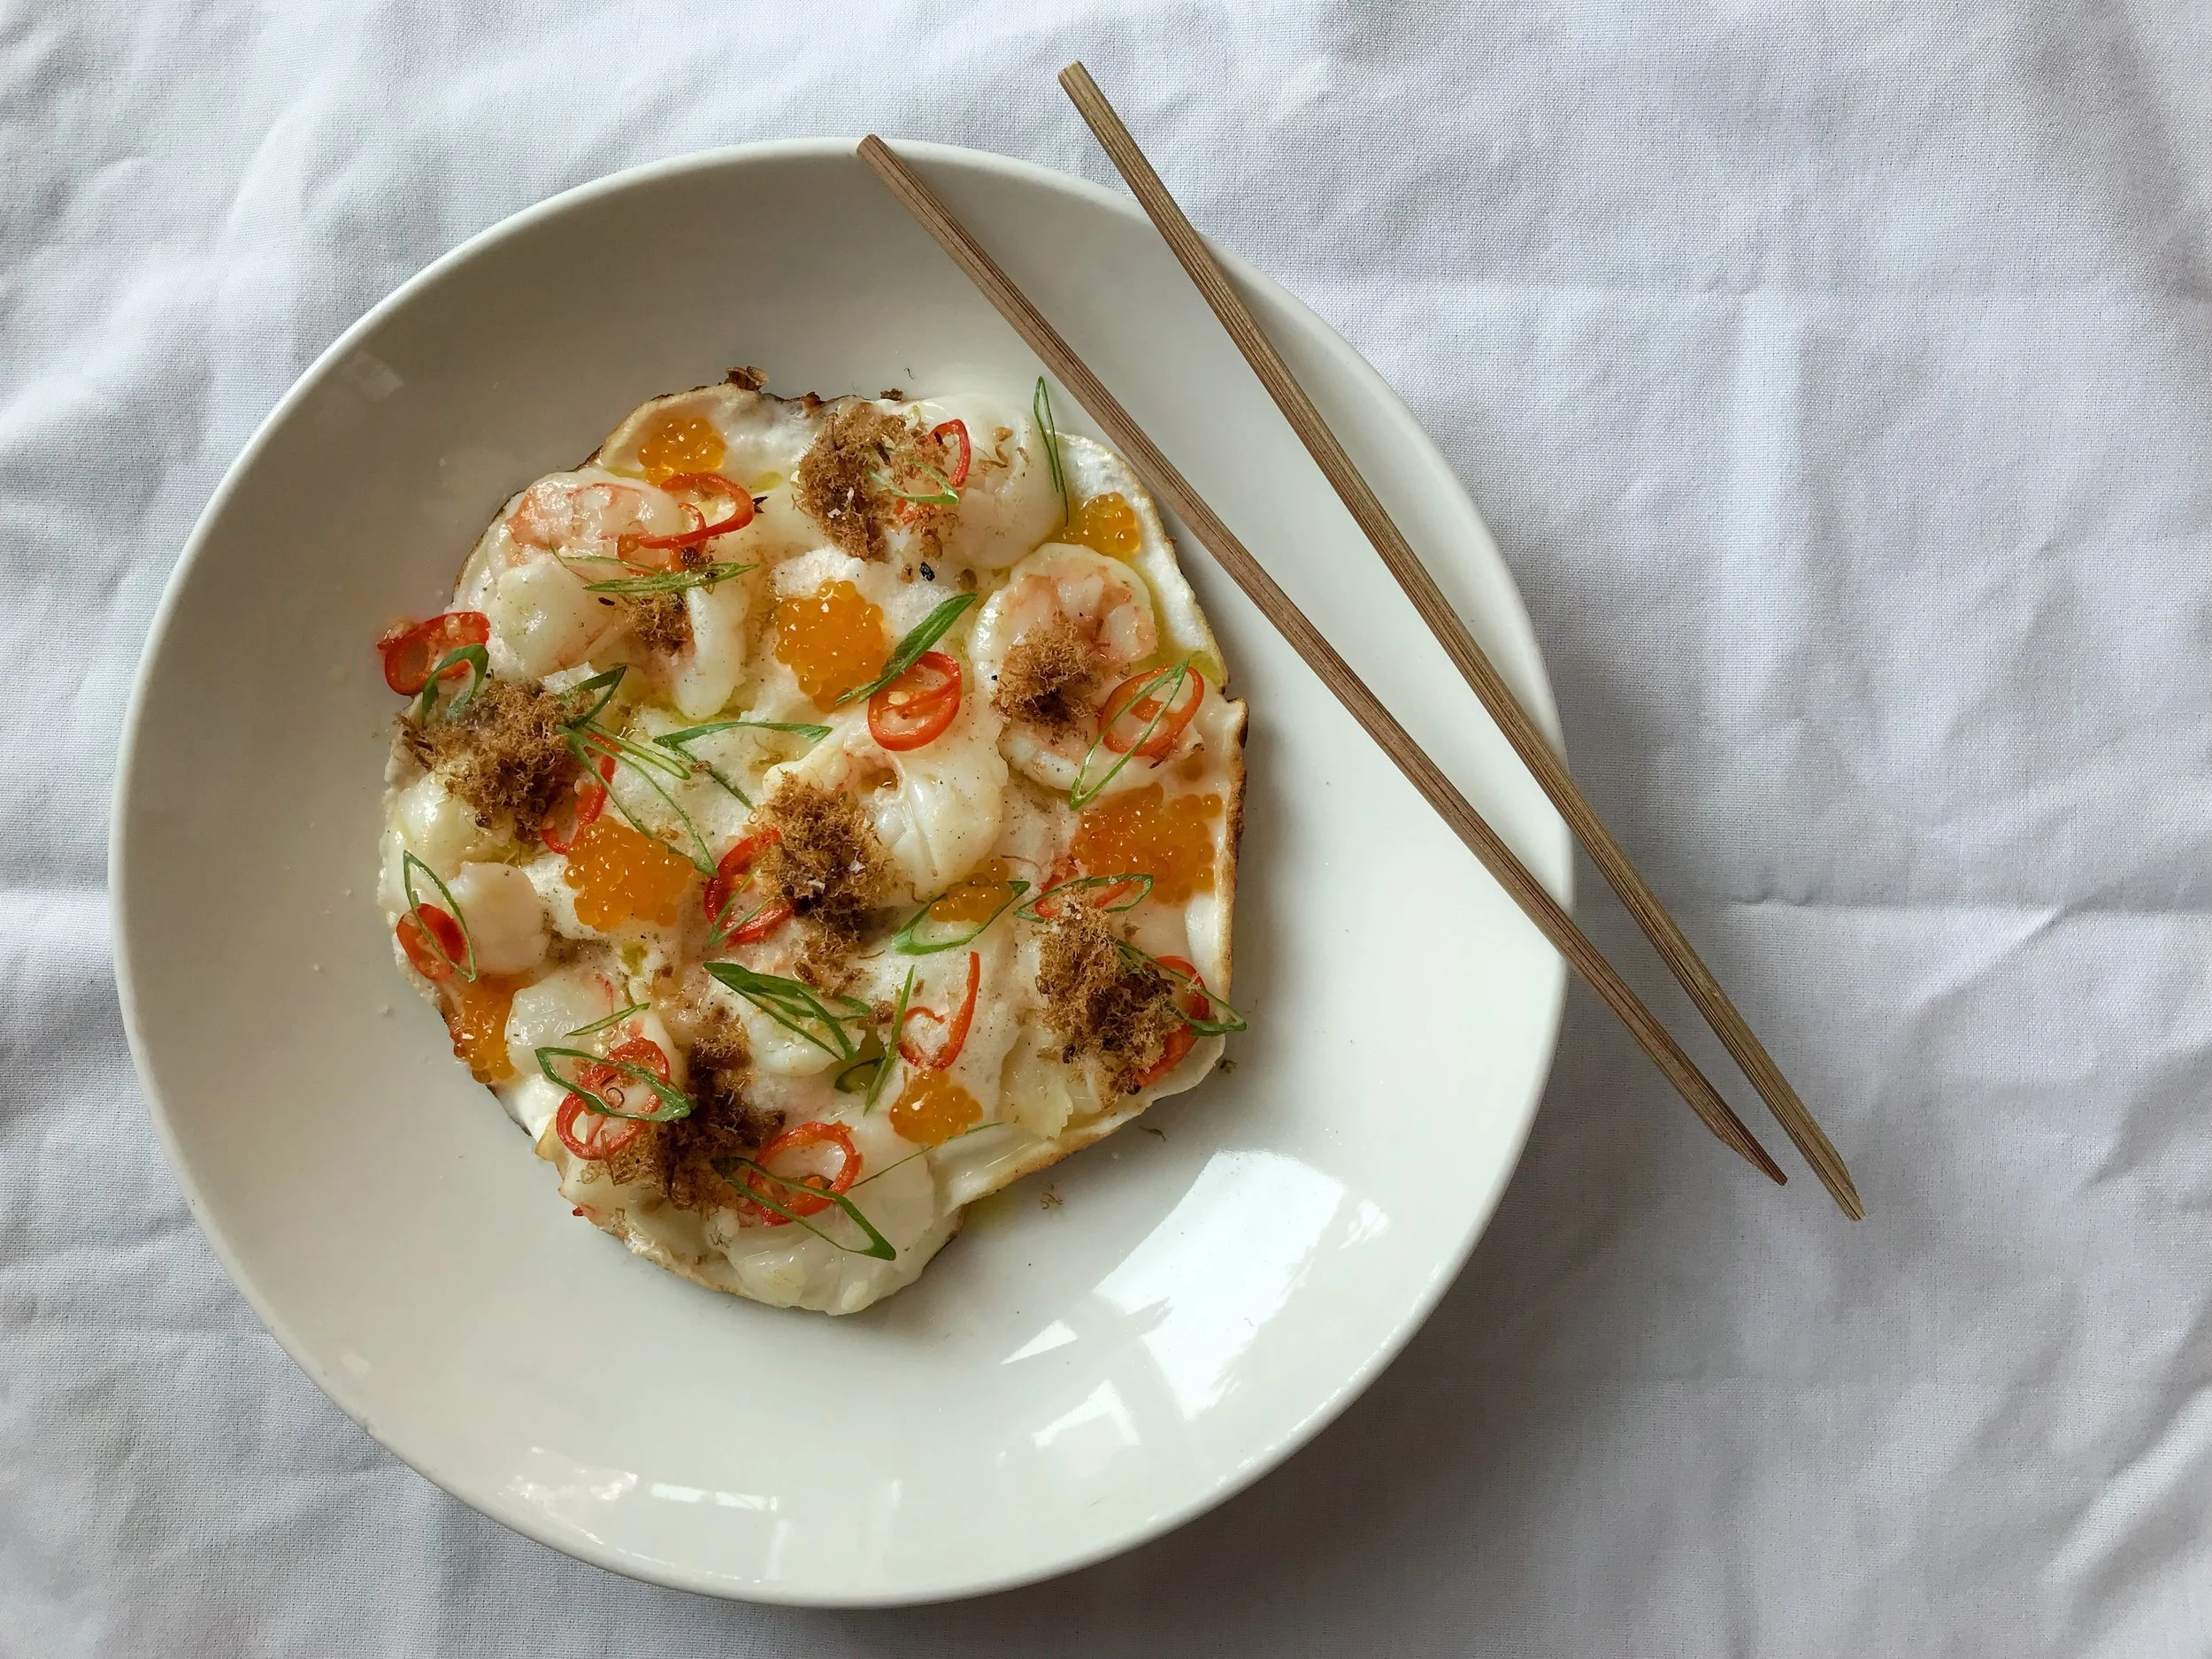
Chinese Eggwhite Omelette with Prawn, Caviar and Mushroom Floss

I fell back in love with egg white omelettes recently because there are only so many meringues you can make when the yolks are being used for custard or mayo (hellooooo holiday season!). The upside is, that egg whites are high in protein, low in fat and make for some super fluffy omelettes and scrambles aside, if you don’t want to head to Pavlova Town.

This recipe was inspired by an amazing brunch dish served by the very talented chef duo of Jemma Whiteman and Mike Eggert at their restaurant pop up Pinbone in Sydney’s Woollahra; a light, yet complex and indulgent combo of Chinese-style omelette - golden and crunchy on the edges and base, fluffy and cloud-like on top; capped with prawns, mushroom floss (more on this later), and because I was feeling extra, some Yarra Valley golden caviar as well.

Despite looking fancy, it’s actually a very quick and simple dish to make; and a total winner on your next brunch table. Perfect on its own, but also fantastic with a bowl of steamed rice on the side.

Ingredients

Serves 2 as a decent breakfast, or 4 as part of a brunch meal.

1/2 long red chilli, finely sliced

1 thumb sized piece of ginger, smashed

1 garlic clove, smashed

6 -8 large king prawns, peeled, deveined and halved lengthways.

1 shallot (scallion), green part finely sliced

4 egg whites

Mushroom floss (a flavour bomb of umami, made by dehydrating mushrooms - there are also meat versions available at most Asian grocers; pork floss being the most commonly available). This is a garnish and not completely necessary, though highly recommended.

Trout roe (again, not crucial, but it amps up the luxe factor)

Vegetable oil

Salt

White Pepper, finely ground

Method

Heat a small, non stick frying pan to a medium-high heat. Once hot, and add a teaspoon of vegetable oil and the chillis. Fry for around a minute, then remove the chillis from the pan and set aside. Add a little more oil to the pan, then throw in the ginger and garlic, and stir fry for a minute, to allow their flavours to infuse the oil. Add in the prawn meat, allowing it to lightly colour before flipping. Cook for about 2 minutes, until they’re almost fully opaque, but not quite- you don’t want them cooked all the way through, as they will continue to cook once placed in the omelette. Remove the prawns, and set aside. Discard the garlic and ginger. Remove the pan from heat for a moment.

In a blender, place the egg whites, a good pinch of salt and white pepper and blitz for about 30 seconds, until frothy. Going back to the stove, place the frying pan on medium high heat. Once hot, add a generous slug of vegetable oil. This is what will make the edges go golden and crispy, so don’t be afraid to use more than you think you should (this dish is very low in fat, you can stand to use a little more oil in the cooking for the right result). Once the oil starts to shimmer, carefully pour in the egg whites. The edges should start to bubble crisp. You can use a spatula to loosen the edges if you get a little paranoid of sticking.

Once the omelette is almost set in the middle, gently arrange the prawns on top. Allow the omelette to set for another 30 seconds or so (you don’t want it to be fully cooked solid). Using a spatula, gently ease the omelette onto a serving plate. Garnish with the spring onions, the fried chili, mushroom floss and caviar. Add a few drops of olive oil and an extra pinch of salt flakes to finish, and serve immediately.

A Vegan Chinese Hot Pot

IMG_9588.jpg

Ok, so by now we all know that even the most dedicated of meat eaters should probably eat a few more vegetables...not only for health, but also for sustainability of agriculture. That aside, they're bloody delicious when treated with a little love. Here's probably the simplest recipe I've ever posted, it's a Chinese-style hot pot that's full of flavour, texture and is super good for you as well, lots of protein, healthy carbohydrates and good fats to keep you full. 

Serves 1 hungry person or 2 as part of a meal

Ingredients

1/2 small brown onion, finely sliced

1/4 large sweet potato, washed and chopped into 1 inch cubes*

1 heaped tablespoon, mushroom XO sauce (from the Asian grocery aisle at most supermarkets)

100g firm tofu, chopped into 1 inch cubes (about a third of a packet, as a guide)

1/2 cup vegetable stock

1 handful fresh green or butter beans, trimmed

2 tablespoons pickled mushrooms (optional)

1-2 sprigs green peppercorns (you could use a teaspoon of dried Sichuan peppercorns instead)

Method

Preheat an oven to 200c. In a heavy based frying pan on a medium heat, add a tablespoon of vegetable oil with the onions and stir fry for 1-2 minutes until translucent. Throw in the sweet potato and turn up the heat to lightly brown the edges of the sweet potato for 2-3 minutes. Add the XO and turn down the heat, coating everything evenly. Throw in the tofu and gently stir to combine. Add a pinch of salt flakes and the stock and bring the hot pot to a simmer. Add the beans, pickled mushrooms and peppercorns, stir briefly to combine season, to taste.

Pour the hot pot into a small cast iron dish or any heavy casserole pot that 'just' fits the ingredients (you don't want a heap of space, because you want the liquid to bubble, not evaporate completely). If it's looking a little dry, top with more stock but do not cover completely. Bake for 15-20 minutes or until the top is crispy and golden and the liquid has reduced to a sauce consistency. Carefully remove and set aside until cool enough to serve. Serve with brown rice, noodles or a super fresh cabbage salad.  

*Basically, you want everything to be roughly the same size so everything cooks evenly. Bite-sized pieces are roughly what you want to go for!

Chicken, Ginger, Sweetcorn & Egg Drop Soup

As seen on Everyday Gourmet with Justine Schofield Season 8

As seen on Everyday Gourmet with Justine Schofield Season 8

There are certain dishes you need to learn when you move out of home and start cooking for yourself. I would highly advise 1. A good hangover cure (mine's a 3 cheese toastie with heaps of black pepper and Dijon mustard), 2. Something to impress any guest (a cracking roast chicken is a solid submission), 3. A mid-week no-brainer (my braised lentils with bacon as seen in Good Food)...and 4. A sick-remedy cure-all. 

While I've painstakingly perfected my Jewish Chicken Soup, I've evolved my mum's chicken and sweetcorn soup over the years for maximum ease (handy when you're the sick patient in question), speed (takes about 15 minutes all up) and deliciousness (even less than that to slurp down). It is, also ideal as a quick and healthy snack even if you're not ailing. 

Watch the how-to below!

Makes 4 serves

Ingredients

8 cups chicken or vegetable stock (bonus points if you make it yourself!)

4 chicken thighs, skin off

1 thumb sized knob of ginger, peeled and finely sliced

1 x 410g tin creamed corn

1 x 125g tin corn kernels

1 egg, lightly whisked

Sea salt flakes

White pepper

1 stalk spring onion (scallion), finely chopped into rounds

Sesame oil

Method

In a large pot, add the stock and ginger, then bring to a boil. Carefully add the chicken thighs and simmer for 15 minutes or until the chicken is tender and cooked through. Carefully remove the thighs and allow to cool slightly before handling, then coarsely chop, or shred the meat. Return the chicken pieces to the stock, then add the creamed corn and corn kernels. Bring the soup back to the boil and when it has reached a rolling boil, slowly pour in the egg mixture a little ribbon at a time, gently stirring through the soup as you go (the egg flowers will form while gently moving around the soup - too slow and you'll have a rubbery clump, too fast and you'll just have a cloudy soup). Continue until all the egg is poured into the soup. Season to taste with salt and white pepper, then remove the soup from heat to cool slightly before serving.

To serve, garnish with more white pepper, a few drops of sesame oil and the chopped spring onions. Feel the life flooding back into your body!